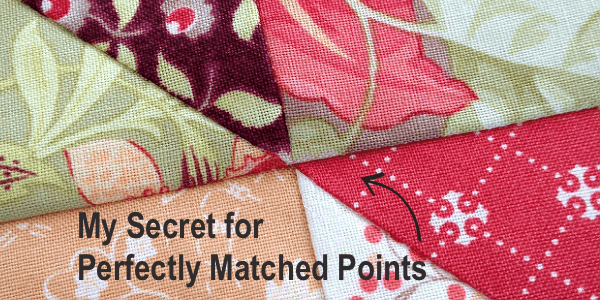
Tips for Perfectly Matched Points in Patchwork Piecing
Last week, while exploring Sewing Superpower - I named Point Matching as mine... and there is ONE obscure thing that I do.
So, what's my secret in Perfect Point Matching?
I'll get to it in a few minute.
First, here are two basic points for perfectly matched points (pun intended. maybe)...
1. Cut your pieces accurately
2. Sew with a consistent 1/4 inch seam
We're all on the same page? Good :-)
So technically, your points should match - as long as you've covered those two things.
But... why are you still having problem matching points?
Chances are, you've only missed the point by a tiny bit. Not a lot....
(doesn't it just drive you mad?!)
This happens because...
Your fabric pieces most likely have stretched while they're being handled.
You might find some fabric stretch more than others. It's fairly common especially when we mix prints with plains or yarn-dye checks / stripes. Because no two bolts of fabrics are identical in weave tension - that's just how they are.
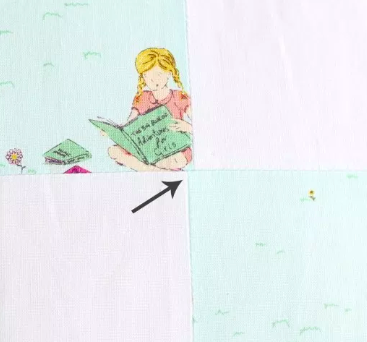
Take a closer look...
You might see the stretched side gaping a bit - sometimes by a hair, sometimes a bit more - but never so much excess that you could make a pleat or tuck. Right?
(well, if you could actually make a pleat or tuck, please trim the excess off before continuing. And thank yourself later.)
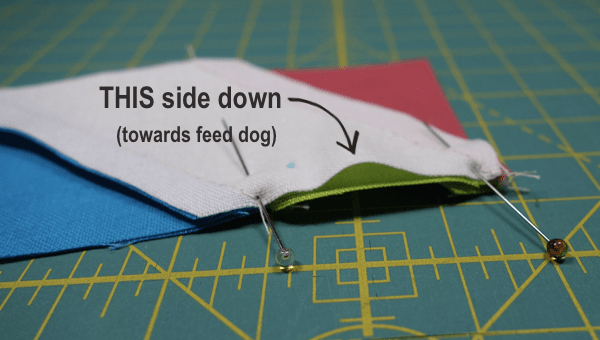
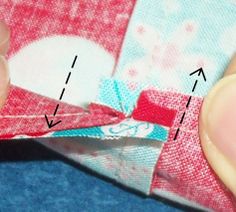
Now, flip this and sew with the gaping side DOWN (towards feed dog). Why is this important?
Because this is my obscure trick, which I've called...
The Feed Dog Fudge (!!)
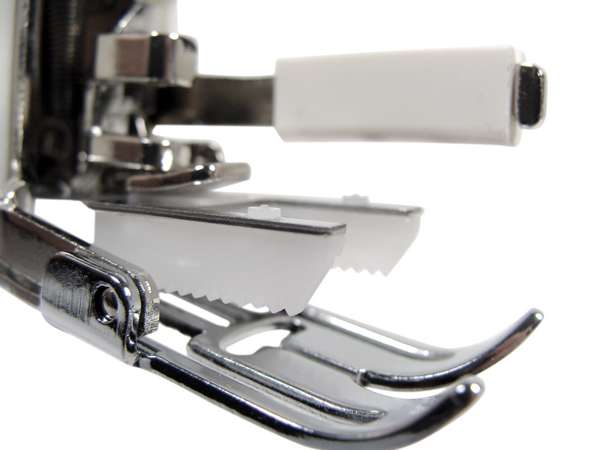
Before we go any further, let's put the fabric aside and look at your sewing machine feed dog for a minute.
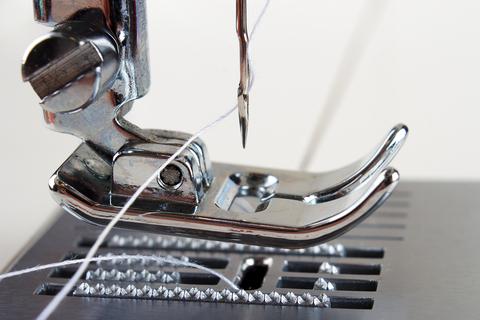
Feed dogs are those "teeth" things found underneath your presser foot. You probably already know the function of your feed dog is to move the fabric along....
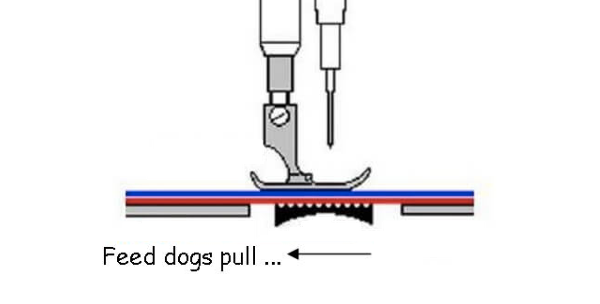
That means the gaping side (shown in red) that sits directly on the feed dog will get slightly more grip and move a wee bit faster, compare to the top fabric layer (shown in blue) which has no direct contact with the feed dog.
In other words - the feed dog's grip will naturally tighten the bottom layer a bit more. That's just how it works.
This ever-so-slight difference in movement is the secret.
Now we sew.
Start at one pin with your needle down, and hang on to your next pin to create a bit of tension - it should be taut, but please don't to grab hold of it with your dear life, you still want the fabric to feed through smoothly and continuously.
Ready? Carefully step on your pedal and start. It's best to sew slower and be a bit more... deliberate about it. Don't forget to breathe. Make sure the pace is a steady flow.
By the time you reach the other pin, the extra slack would have naturally "eased" into the top layer, matching your points. Voila!
You might notice a slight ripple where the excess was eased in. Easy fix - a shot of steam from your iron is all it takes. Cotton is very forgiving, that's why we love it :-)
But Remember.....
For this trick to work, make sure your walking foot is NOT on the machine before you start.
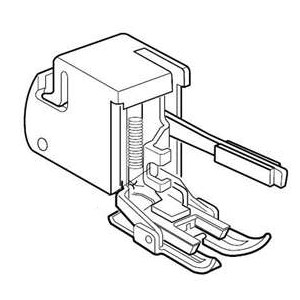
If you'r walking foot is on the machine, take it off now.
Because your walking foot is designed to "counteract grip" your feed dog - by gripping the top layer your fabric with its own set of teeth - which means both fabric layers move in unison. This is perfect for when you're quilting, but not when you're fudging!
How come almost nobody talks about this trick...?
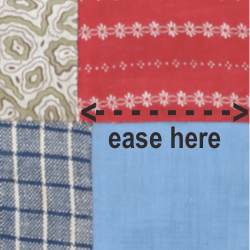
Because the concept of easing comes from dressmaking - which is a 3D exercise with the purpose to house a body (with curves!) in a garment.
In contrast, patchwork piecing is a 2D activity - nothing goes inside our quilts except batting - so the end result is essentially a flat thing. All we want is for our quilts to hang perfectly straight and square on the wall - or receive plenty of hard love and sloppy cuddles. Those are the best :-)
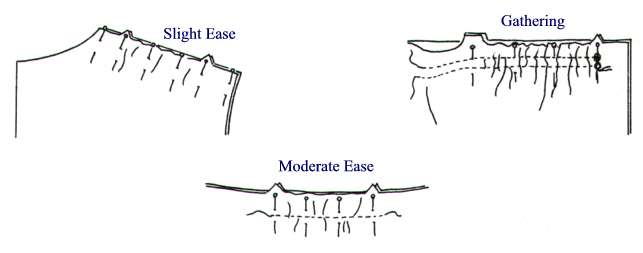
This diagram above shows you how easing / gathering is done in dressmaking . Depending on how much excess you actually need to ease, some extra stitches are often involved when you're making something to wear....
Of course, none of this is your worries in patchwork. Since we're only doing a slight ease, there's never any needs to run a gathering stitch. Just let your feed dog do its thing. Simple.
Remember - a shot of steam from the iron is all you need to shrink back any excess ripple - so your blocks will have perfectly matched points!
Perfect piecing is easy with the Feed Dog Fudge :-)

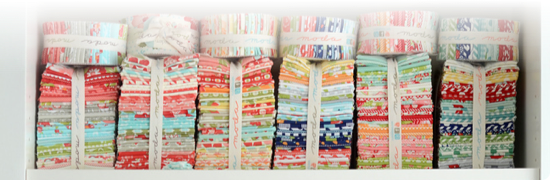
Love these happy colours? You'll love fabric by Bonnie & Camille :-) fabric by Bonnie & Camille :-)
https://www.sewmucheasier.com/brand/moda/bonnie-and-camille/
Want More?
Here are some other important tips for perfect patchwork piecing - you most likely have heard them all, because these they are all tried and true tricks of the quilting world :-)
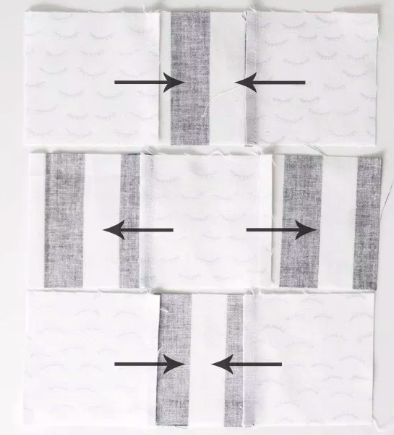
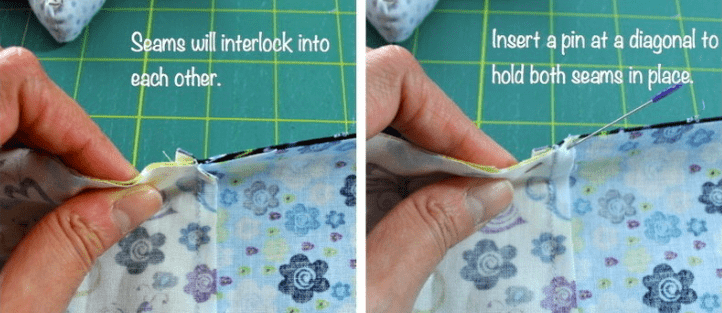
Nesting (or Locking) Seams
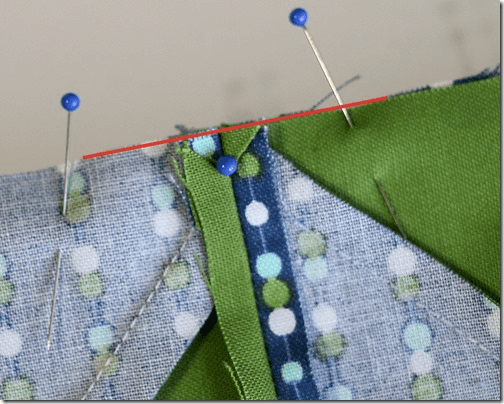
Press your seams to one side (normally the dark side) and "butt" the two seams together. I've heard this charmingly referred to as "making the seams kiss" by a lovely teacher. Check that there's no gap at the point before you sew.
Here's a quick video demo:
The same idea works brilliantly in multiple rows too. Alternating those seams really help your points match!
Satisfying, right? Still, there's one step further you can go....
Splitting & Spinning Seams
This is my personal favourite - I find it (almost) as therapeutic as popping bubble wrap....
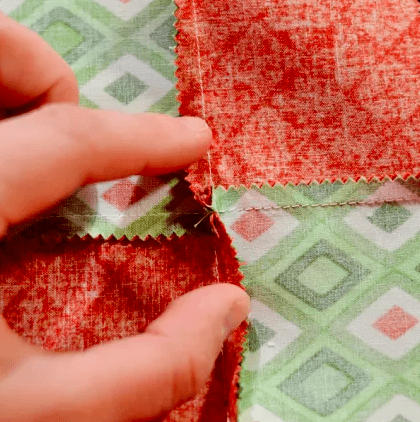
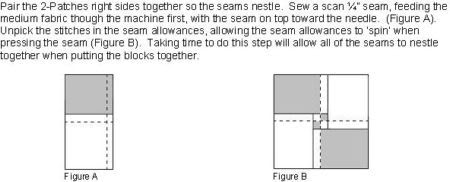
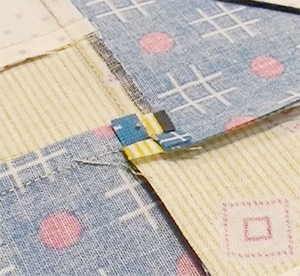
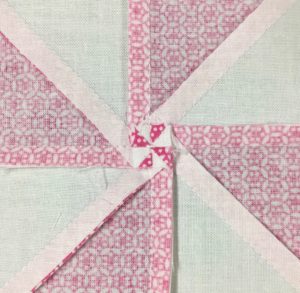
You "pop" a few stitches so that you can fan the seams out, spreading the bulk evenly so that you don't end up with a lump of piled-up seam allowances.
Instead - you'd have very some very neat (and pretty) seam configurations that help your blocks press up nice and flat. Why is this important?
Because lumpy seams make quilting difficult. My long arm quilters love me because my quilt tops don't have lumps. Happy quilter, better quilting. Now you know my secret :-)
Last but not least - there's a point that's often overlooked...
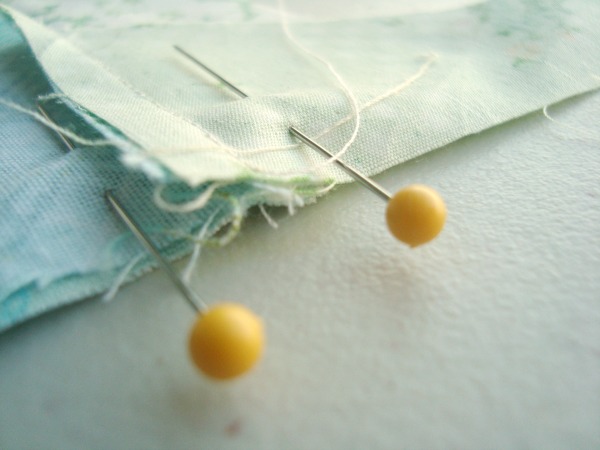
Pinning
How well you pin can determine how well your blocks turn out. And there are different thoughts on the best spot to pin.....
You can pin straight through the point.

You can pin diagonally...
You can pin either side of the seam.
Before we debate about which way is best - let me just say that there is no right or wrong way. It's entirely up to you (this brilliant article goes into more details).
For me, I generally pin on either side of the seam.
Why? Because your pins has width. Especially if you use these patchwork pins.
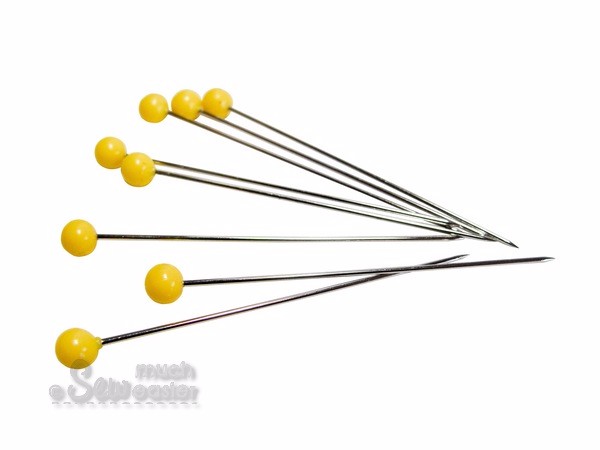
These long yellow pins are the most popular pins for patchwork. They are strong yet flexible - almost like millenary needles - but they are not the thinnest of pins.
That means pinning through the middle of you point might actually leave you a pin-width gap. It's easy to avoid this gap by simply placing a pin on each side of the point. Happy days!
Of course, there are times when you'd really need a pin in the middle of the point...
In this case, you'd be better off using finer pins - like these ....
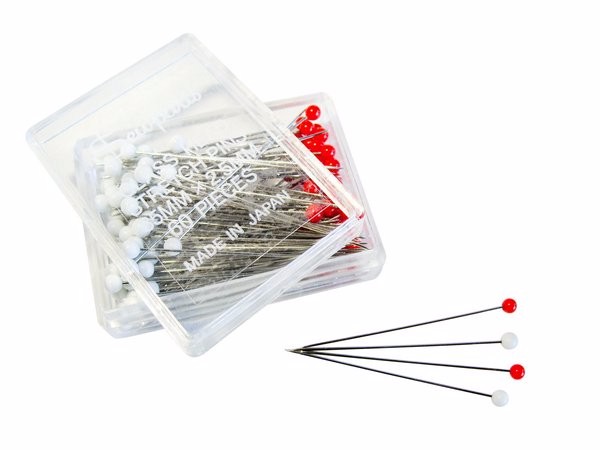
These little beauties have glass heads - no worries when you iron over them!
Before we go - let's re-visit this old chestnut...
Scant Quarter Inch Seam
Make sure that your 1/4 seam is a thread's width on the scant side - barely touches the point. Why is this important?
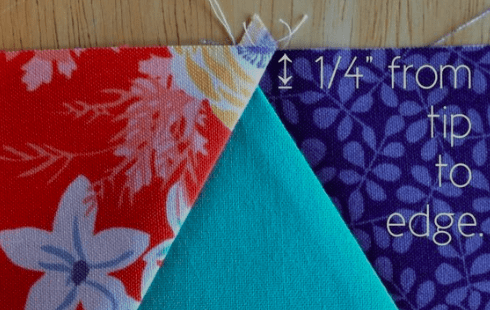
Because a hair too close towards the point could look like you've chopped the tip off (you'd often only see this afterwards, when you go to press the block), whereas a hair away from the point would still show the point - but make sure you're not too far off the point either. Just one hair :-)
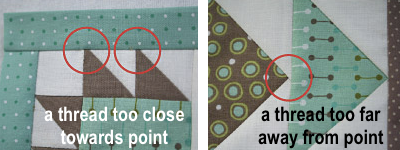
See? A small difference makes a huge difference.
it's actually quite easy once you know what causes your points to miss, and just do the opposite :-)
What if your point still don't match, despite all that?
Well, you can always chop the offending points off by changing the block design...
Or, simply leave the imperfection and move on. Have a cuppa.

Chances are, nobody notices except you :-)
Hope this helps - and please let me know how you go with the tips.
Better Still - Please Send me photos of your piecing.....
Some "Before & After" shots would be wonderful :-)
Happy Piecing!
![]()
xoxox
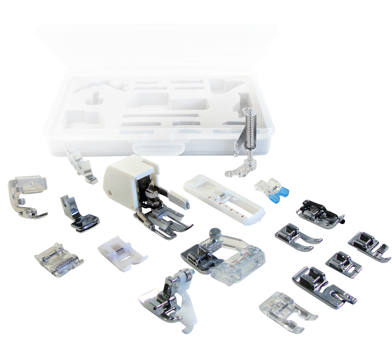
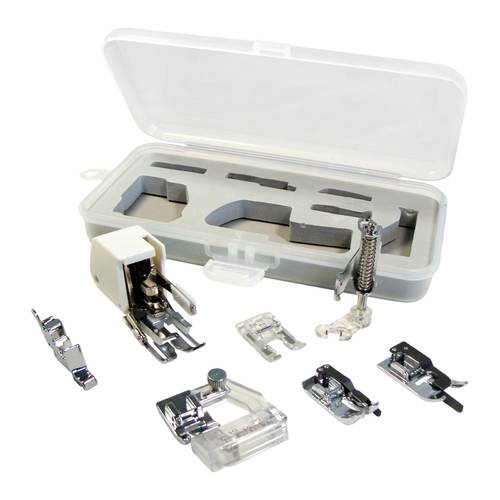
P.S. Want a hand with getting accurate seams? Try a Quarter inch Foot if you don't already have one.
If you're also after a Walking Foot, a Darning Foot, a Stitch-in-the-Ditch Foot etc... it might be worth your while getting the Quilter's Set - you'll save at least $100 bucks by the set vs. just buying one foot at a time.
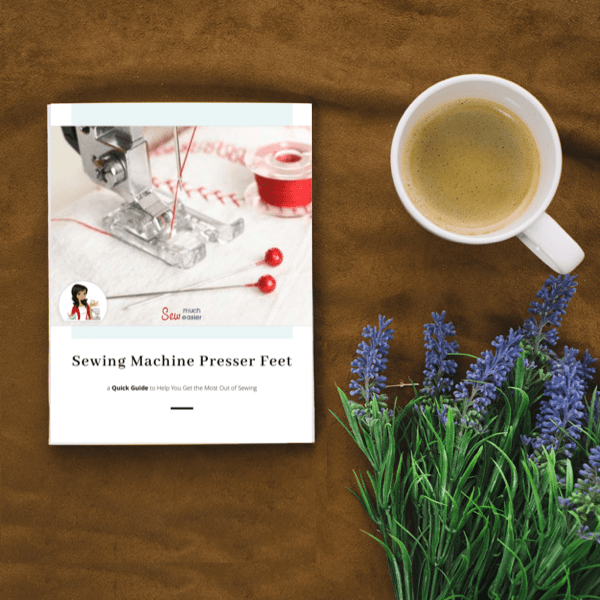
P.P.S. Still want more? Here's a FREE Comprehensive eBook for you:
Download it Now - it's yours.
You'll find heaps of useful (yet non-boring) information to actually help you sew easier (with less unpicking) - no matter where you are in your sewing journey :-)
Enjoy!

O.
M.
G!!!
How had I not thought of this before?! It's genius!
Thank you so much Shelley!
I'm about embark on a Moda Bakeshop pattern that has lots of 2.5" squares and strips to match up (a bit like a log cabin), so I'll be putting this into practice for sure!!
Cheers
Selena

Thank you. Just read your hint for matching points this morning. Very interesting.
I haven't done any machine patchwork for ages. Will remember it.
- Shirley