All About Binding Part 2: How to Mitre Corners
Have You Ever Wondered How to go around a square corner using a bias binding foot?
This article show you how to put mitre corners on your quilts with your sewing machine the easy way!
Since putting binding on a mitre corner relates to quilts, I will focus this article on how to finish a quilt using bias binding AND have the corners mitred. Hopefully you will find this helpful!
What Does “Mitre” (or “Miter”) Actually Mean?
The definition of the word “Mitre” refers to a joint.
According to Wikipedia, a mitre joint (spell “miter” in North America) is a joint made by beveling each of two parts to be joined, usually at a 45 degree angle, to form a corner, usually at a 90 degree angle.
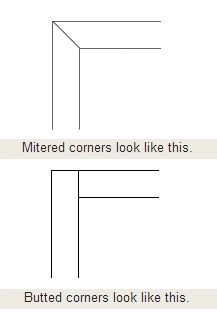
When referring to fining a quilt with binding – there are two ways of binding square corners (1) mitre (2) butt-join.
The look of “mitred” is by far most popular, but most people assume that it is the more difficult method.
I was certainly intimidated when I first started, but once I’d got the hang of it, one method really isn’t more difficult than the other.
So, which way is better: Mitred or Butted?
Functionally, they are both going to hold up ![]()
That means the decision is mainly based on personal preference.
In most cases, to determine whether you’d finish you binding by the mitered or butted method, simply take a look at how the border of the quilt was put together:
- Was the corner of the border butted?
- Or was it mitered?
- Does it look better one way or the other?
Your decision is easy to make from there.
Here, let’s look at How to do Mitre Corner with Bias Binding…..
The easiest way to explain is to show how it’s done in action. These are two of the best (and clearest) YoutTube clips I found:
You’ll see that the first video shows the traditional “Two Step” method (also known as “Double Stitch” method), while the second video uses the “One Step” (or “Single Stitch”) method.
Whichever method you choose, there is NO right or wrong – just personal preference. And we will cover these two methods in-depth in a separate article (so stay tune)!
Now, if you use a Bias Binding Foot and
Wonder HOW to go around Square Corners…
I’d have to admit that I wondered the same thing.
While I LOVE using my Bias Binding foot, I’ve always done my quilt binding in the traditional “Two Step” way (since I also cut my quilt bindings in STRAIGHT grain).
For me, the bias binding foot has been used for actual BIAS bindings on clothing (i.e. going around necklines and armholes) and other household items such as place mat, apron and bibs. These things normally has curved corners and I haven’t had to figure out how to do miter corners with these….
Nevertheless, it occurred to me that a lot of people DO want to use this foot to bind their quilts – that means being able to go over a SQUARE corner becomes an absolute necessity. Oh my.
And for the life of me, there is hardly ANY information around. I’ve hunted high and low for a method that I’m actually happy enough to use myself. I think I found more questions than answers….
Until I came across this:
Who knew? This video was made by none other than Janome themselves.
Sure, the foot they use is different (it is a width-specific, non-adjustable, cone-shape, industrial-style attachment, which means you’d need different ones for EACH different binding widths), but the principles are the same.
After a bit of trial-and-error, I’ve figured out what worked for me ![]()
*** Ugly Demo Sample Warning: for the purpose of this demo, I used a quilted piece of calico that has red thread on the front and black thread on the back to show you the different sides. Also using a cream thread on red binding***
First, I ran a zig-zag stitch around the raw edge of my quilted-but-un-bound quilt ), so that the layers are flattened to make it easier to feed into the plastic slot of the foot. For this step, you can overlock the edges if you prefer.
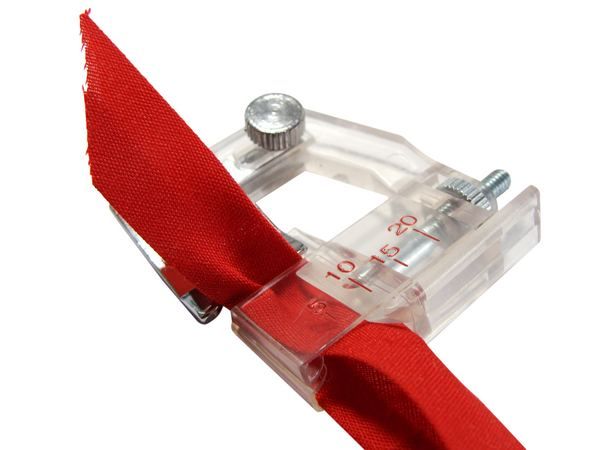

Second, thread your prepared binding into the foot and adjust the slot into the correct width of the binding so that it is a snug fit.
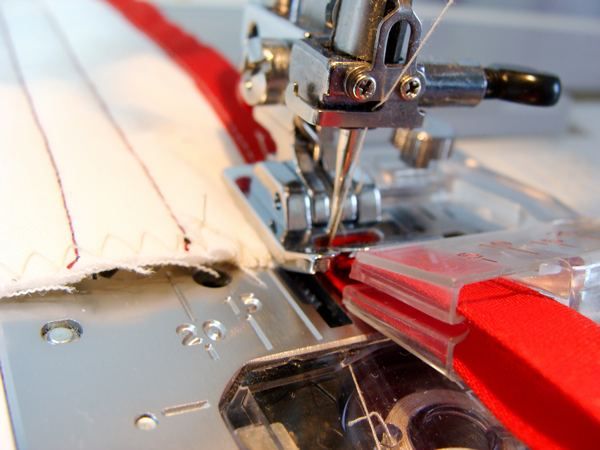
Then feed your prepared quilt into the slot, encasing the raw edge into the binding and stitch all the way to the corner (be sure to finish EXACTLY at the edge), then back stitch and cut the thread.
Next I lifted the presser foot and pulled the quilt out just far enough, leaving just the bias binding in the foot. I turn the quilt corner by 90 degrees and fold the bias binding around the corner as shown in the second video.
How Did it Go Again? Let’s See it Step-by-Step:

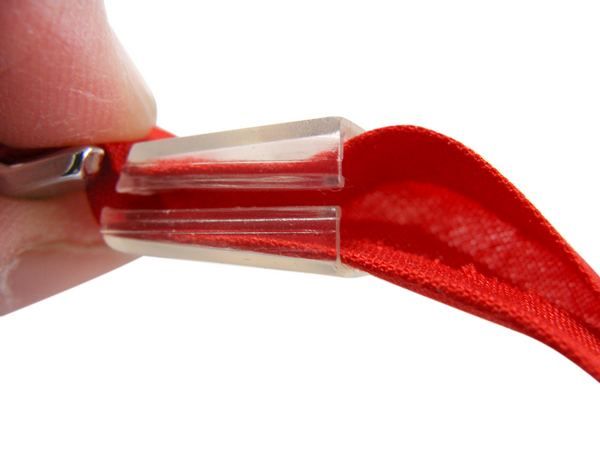
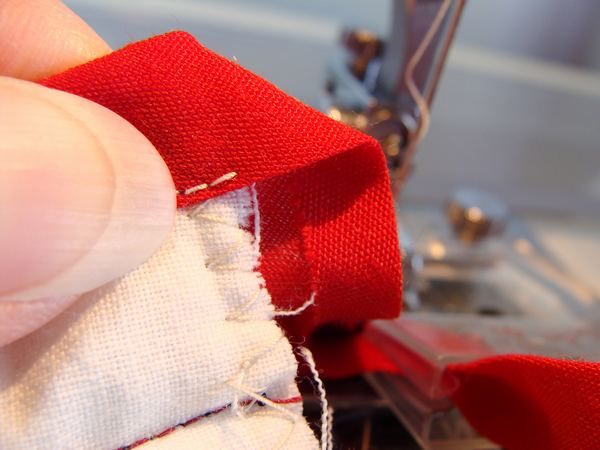
1. This is what your piece looks like when you pull it out of the foot.
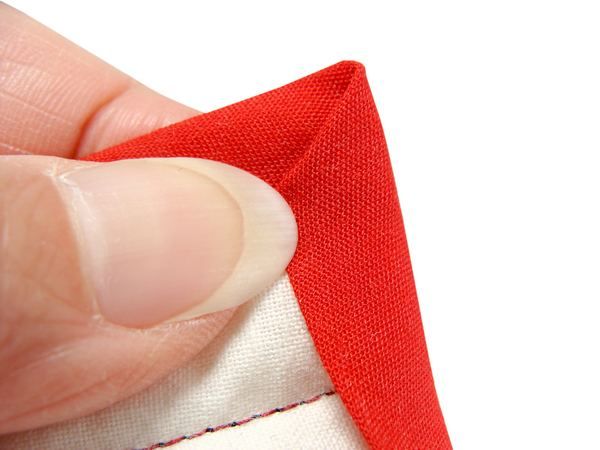
2. Open the fold, then turn this opened up binding 90 degrees towards the next edge
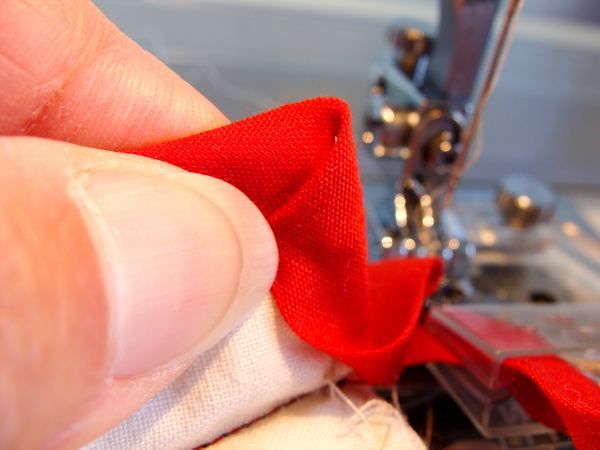
3. This is what it looks like on the BACK.
Make sure the edge of your quilt lines up with the fold line of the binding
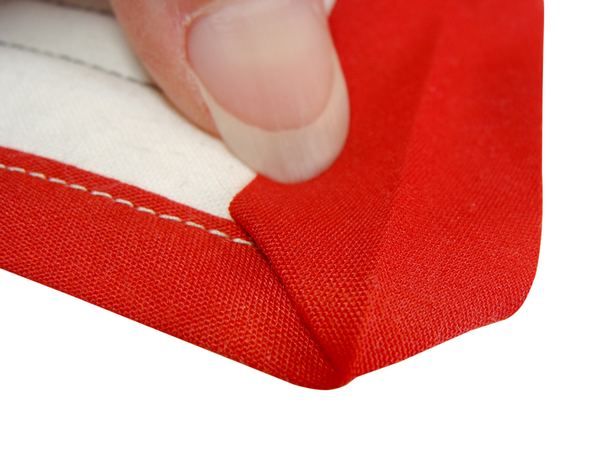
4. Then fold the FRONT half over, wrapping the edge of your quilt

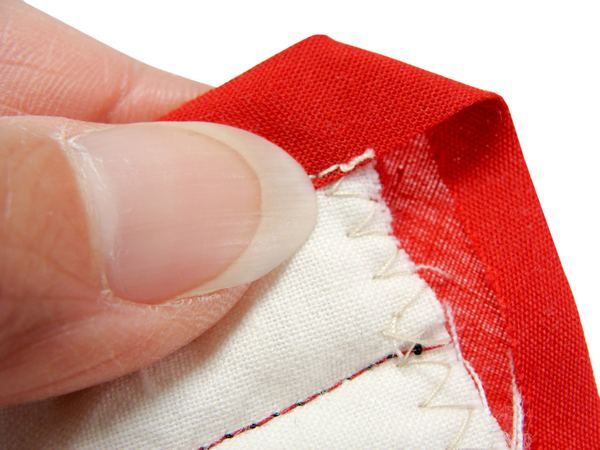
5. Use a pin or clip to hold the mitre fold in place.
You can give it a quick shot of steam from your iron to set the fold.
NOTE: I often take the pin out once the fold is set.
Because I find it easier to get it back into the foot without the pin.
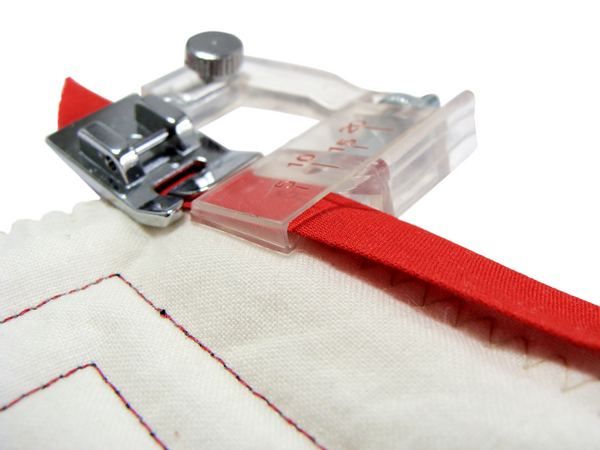
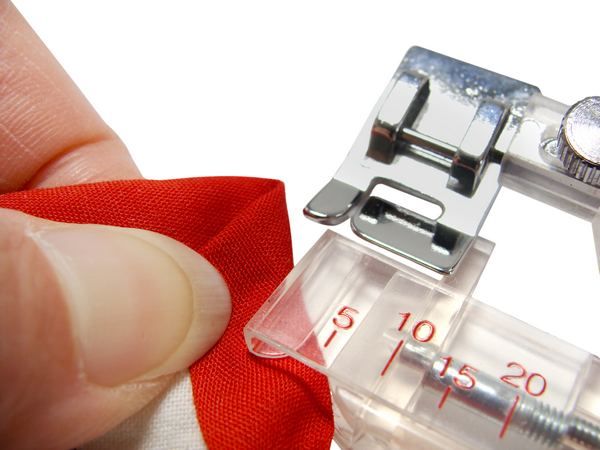
Carefully p osition this directly under your needle, and lower your needle into the exact spot where your mitre fold starts. Back stitch in that spot a couple of times then sew on as per normal until you reach the next corner.
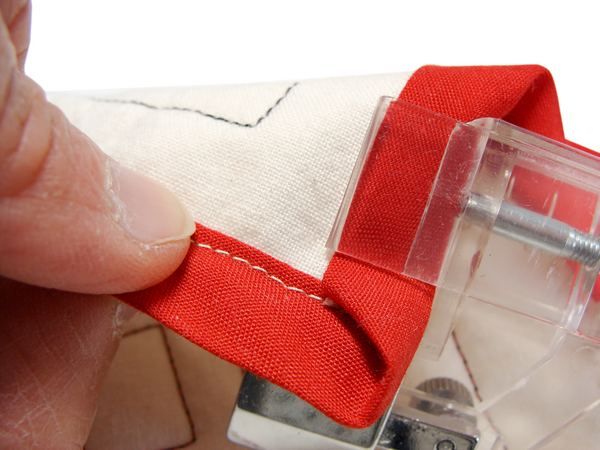
And, this is what the back looks like before you put the foot back to the machine.
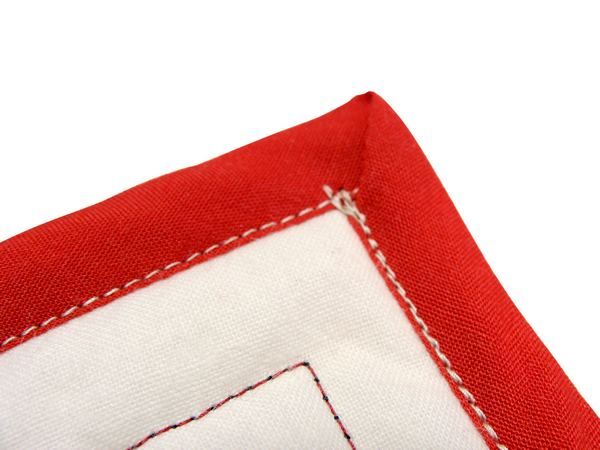
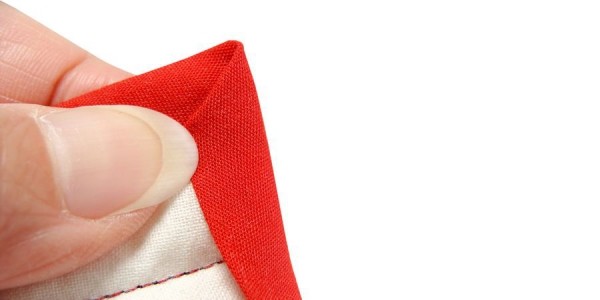
Voila! Perfectly mitred corners by bias binding foot. This is the FRONT.

And this is the BACK.
Please forgive me for the messy work – the point was to show you how this method works, at the last minute I just whipped together something really quickly so you can (hopefully) see what I mean ![]()
A bit of Disclaimer here:
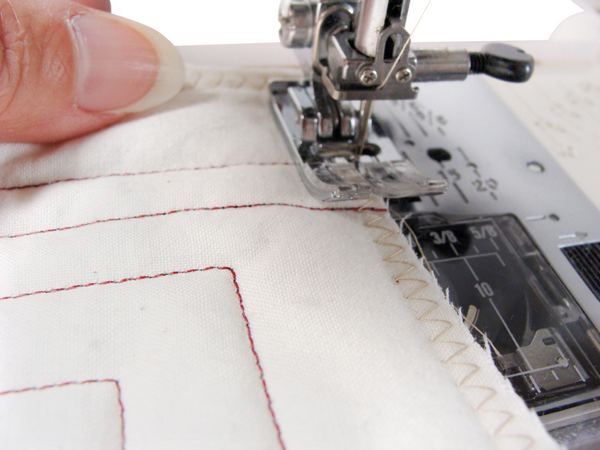
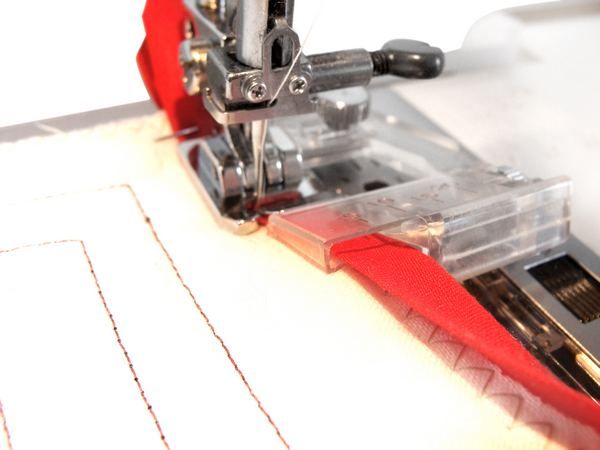
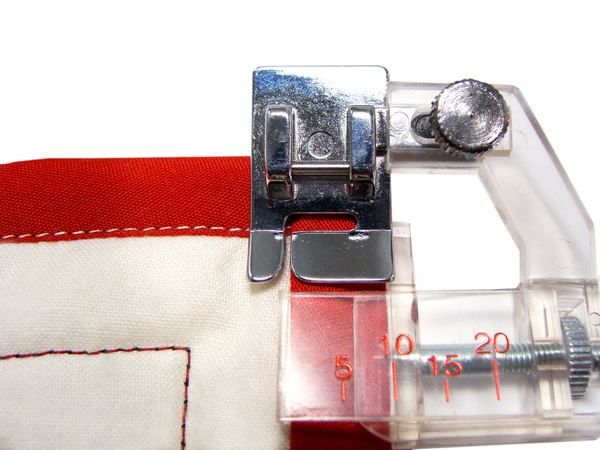
This method works on quilts with low-loft battings which are flatter and thinner (and NOT with battings with high loft, which are thick and fluffy). Because you DO need to feed the whole quilt sandwich into the slot of your binding foot. See photo.
Also, many quilters still prefer to bind their quilts in the traditional, TWO-Step Method, as opposed to a ONE-Step Method (shown here) which is more commonly seen in production*. We will cover more of these two methods in another article.
While it may seem fiddly at first, you will find that you DO save time overall by stitching just once to catch all layers – with the help of the adjustable bias binding foot – and just paying a bit of attention each time you get to the corner (there are only four corners in most cases anyway).
As always, please feel free to ask me any time you feel unsure . I am happy to see what I can do to help ![]()
Happy Sewing!!

xoxox
P.S. Like to try mitering with a Bias Binding Foot? Find it HERE .
And, if you’d like to know how to mitre corners, here's Part 1:
Binding: Cut on Straight or Bias?
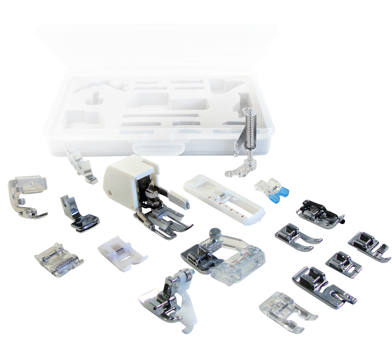
P.P.S. And, if you’d like to discover more about the various types of presser feet (and an overview of what they do), have a look at this one:
A Quick Guide to Your Sewing Machine Presser Feet
And if you’d like to learn some “Behind the Scene” Secrets, Read THIS :
Not All Presser Feet Are Made Equal
P.P.P.S. Still want more? Here's a FREE Comprehensive eBook for you:
Download it Now - it's yours.
You'll find heaps of useful (yet non-boring) information to actually help you sew easier (with less unpicking) - no matter where you are in your sewing journey :-)
Enjoy!
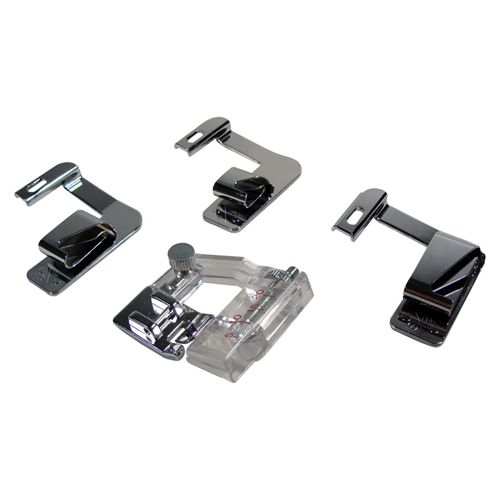
Bias Binding & Rolled Hemmer Set (Universal for 7mm & 5mm machines)

Adjustable Bias Binding Foot (Universal for 7mm & 5mm machines)

This is the most helpful binding instruction I have ever seen! Thank you!
- Renee

Oh, very nice. I've been doing something similar but not as neat looking. I can't wait to get a binding foot and start doing it this way.
- Jennie
Something I just learned while making a rag quilt of flannel I make my own binding out of the leftover flannel fabric, and I found there was too much bulk to make neat mitred corners. So, I cut the corners off the ends of the quilt, about a 1/2" triangle just before turning the ediging. Made everything lay down nice and neat when I turned the edging and completed sewing.
- MK
I already got my foot and used it just coulln't figure out the corners. Thanks for the instructions.
- Yvonne
I really appreciate the visual help you took to help expain the directions!! Thank you!
- Sheila
Thanks! I have been searching for a good tutorial on how to mitre corners with a binding foot. I was about to give up. Greatly appreciated!
- Joy
THANK YOU!! I just purchased the binding foot and was trying to figure out how to do a mitred corner. This is great, I am a person who needs a visual.
- Veronica
I recently bought the quilting feet bundle and the bias binding foot looks so foreign but wow, look at that! Amazing, thank you for sharing :-)
- Liz
Thanks for the instructions! I’m really looking forward to using this new binding foot on my quilts. I hadn’t thought about binding on the bibs I make but it should be great on those too. I gather it will work as well with purchased binding too.
- Bunny