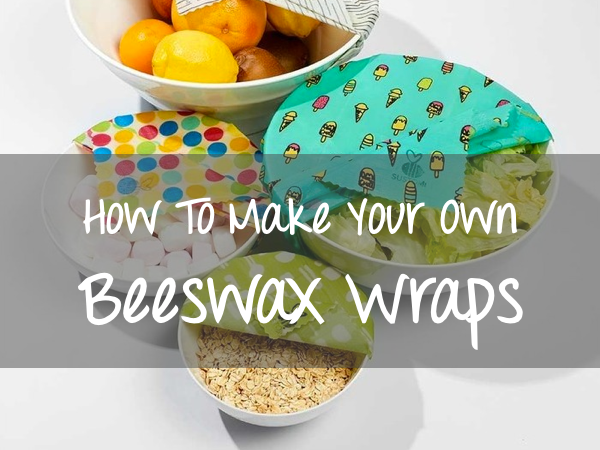
How To Make Beeswax Wrap - with iron or Elnapress
Beeswax Wraps replace single-use plastic cling wraps - and I've been meaning to make some. As it turn out....
Something
Nikki
said piqued my curiosity.
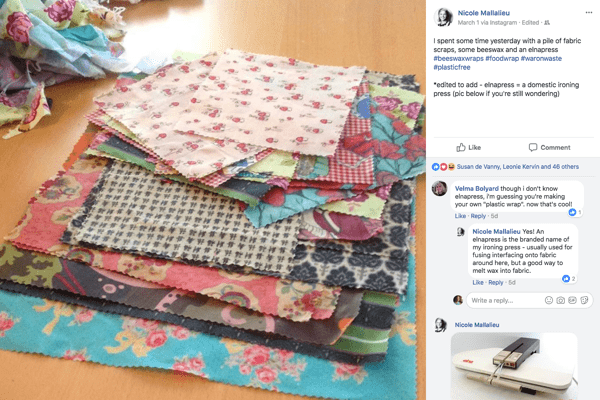
"I spent yesterday with a pile of fabric, some beeswax and an
Elnapress
..."
Beeswax Wraps?! With patchwork
cotton fabrics?
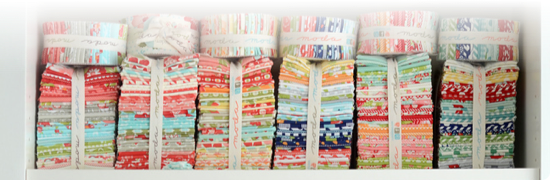
Because of my
Fabric Stash Challenge
, there
will be some fabric that could turn into bees wax wraps - to help minimise Gladwrap usage at our place.
Why Not?!
With Google's help, I found
this
Tutorial
and
YouTube
video with the simplest method:
Using
just beeswax is probably the easiest place to start.
There are
other recipes that incorporates resins and jojoba oil. The idea is that resin improves the stickiness, and jojoba
oil helps to keep the resin and beeswax combined. Though there seems to be some
mixed results about this, so I've decided to just keep it simple.
By all means, feel free to experiment if you like :-)
Here are the steps for DIY Beeswax Wraps:
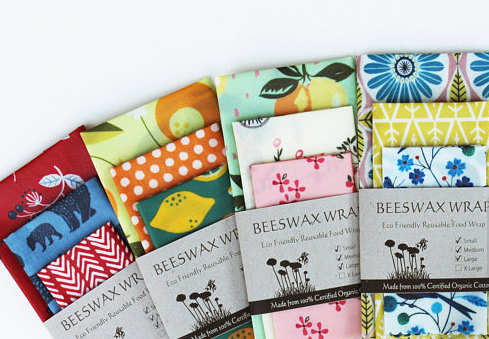
1. Make sure your
fabric
has
pinked edges to prevent fraying.
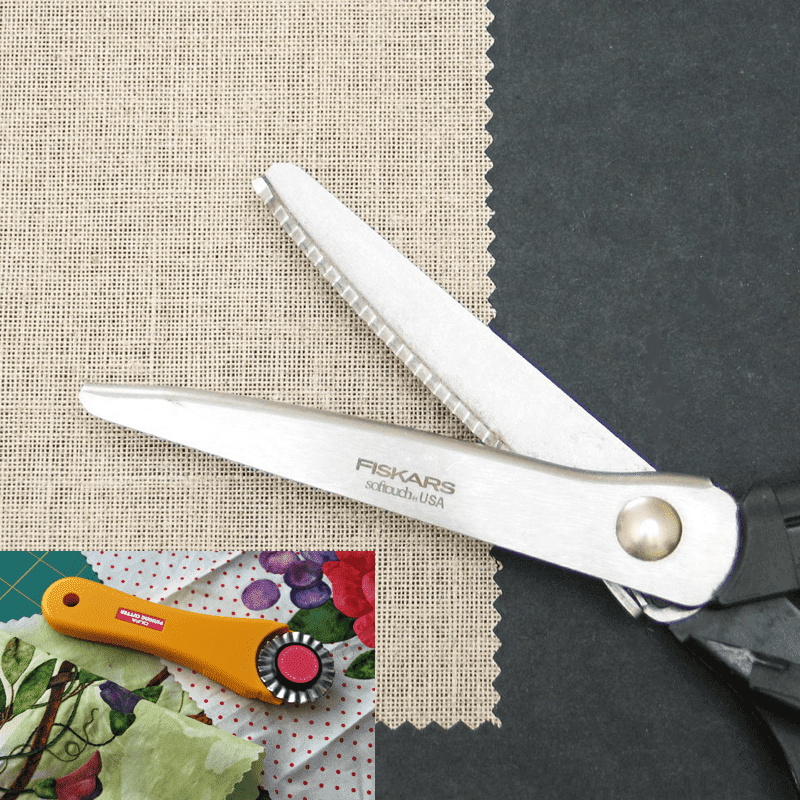
Use pinking shears or rotary cutter with a pinking blade if you're using
Fat Quarters
or
Fat Eighths
.
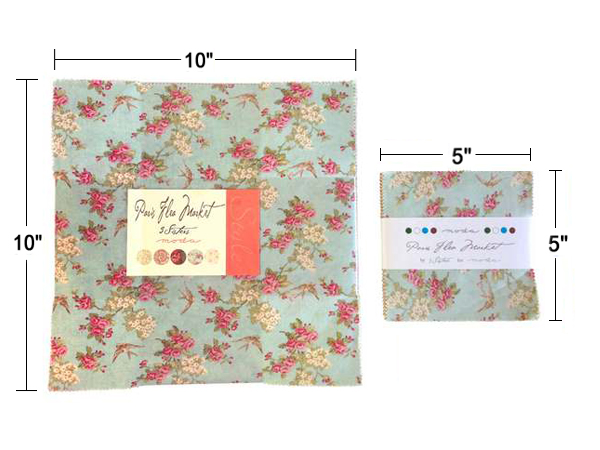
Even better -
Layer Cakes
(or even
Charm Squares
) are
perfect because they are pinked already!
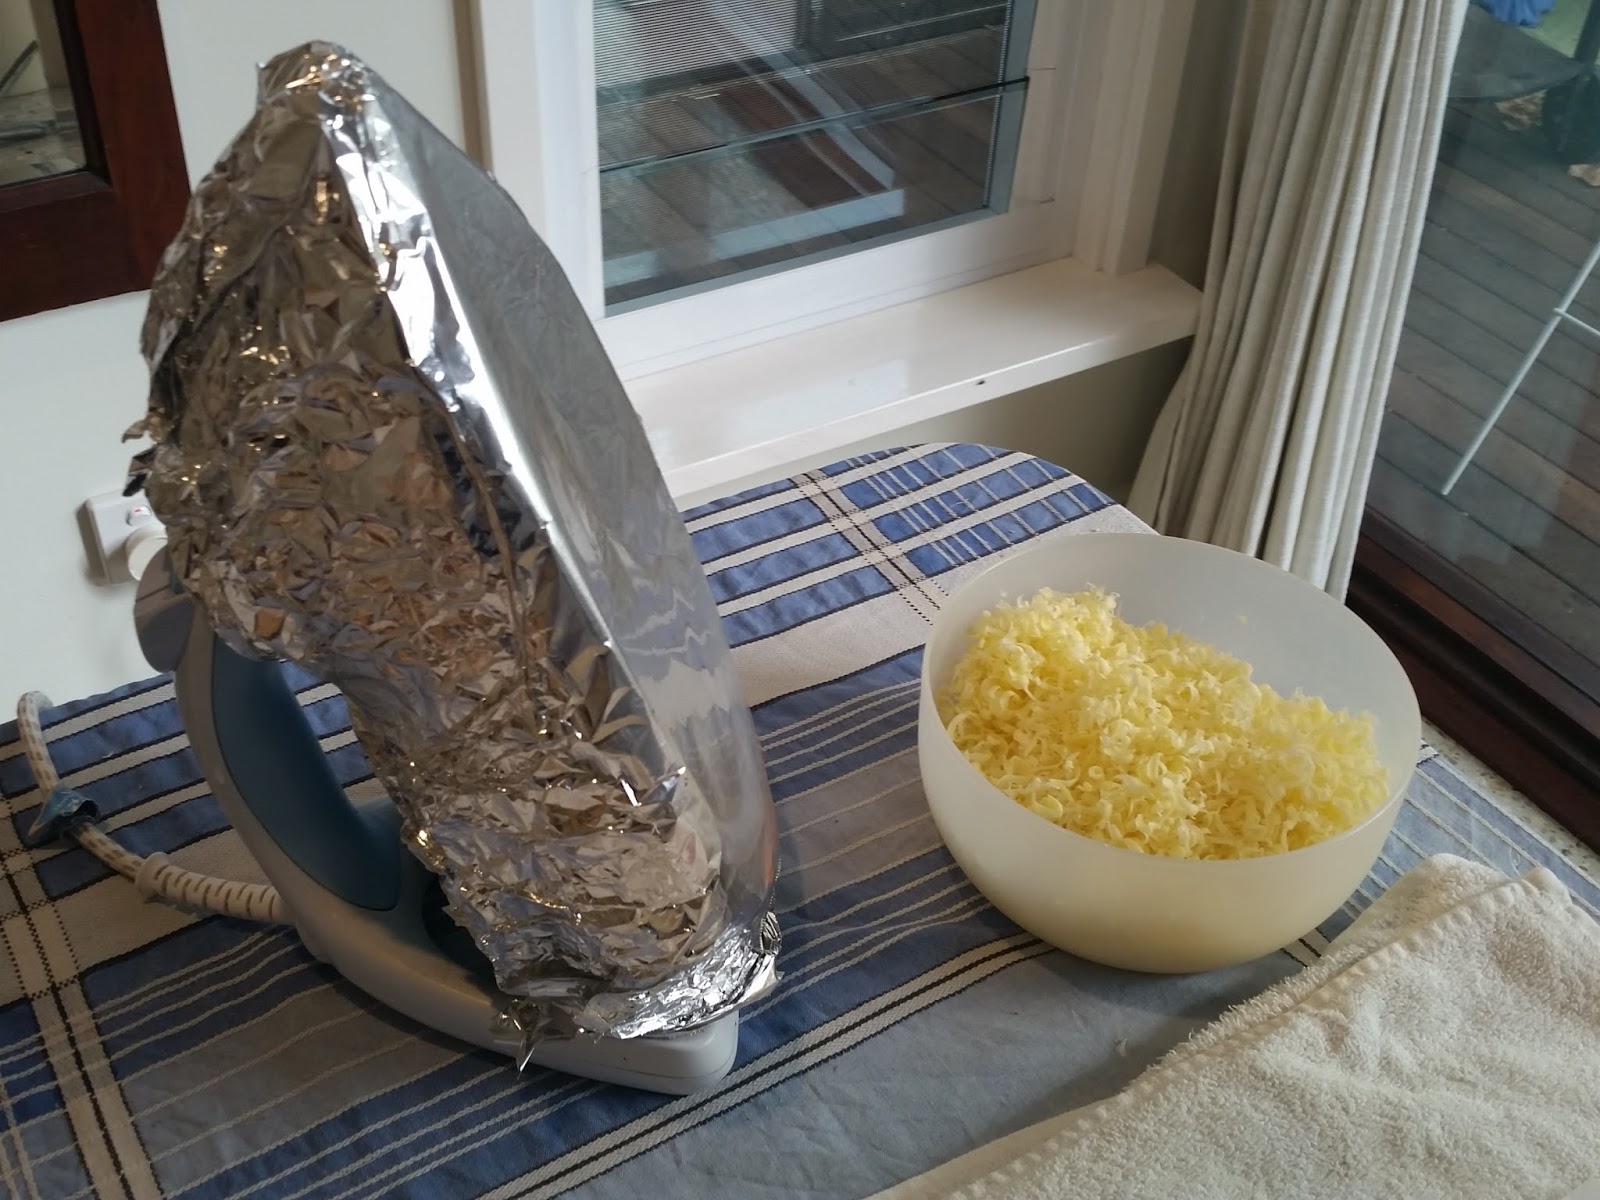
2. Protect your ironing surfaces with old towels and baking paper. Covering your
iron
with foil should do the job :-)
Make sure there is baking paper
on BOTH the bottom and the top of your
fabric
- and use old towels to further protect your ironing board and iron.
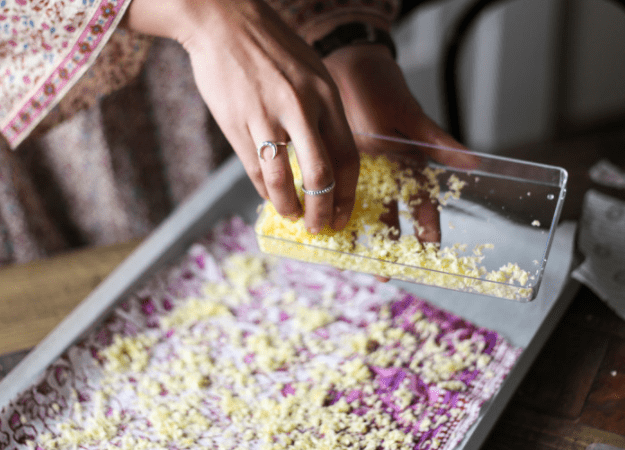
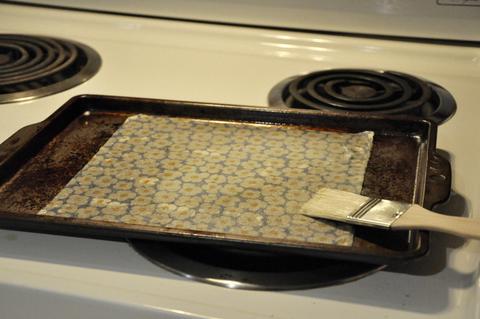
3. Sprinkle grated beeswax evenly over the
fabric
surfaces.
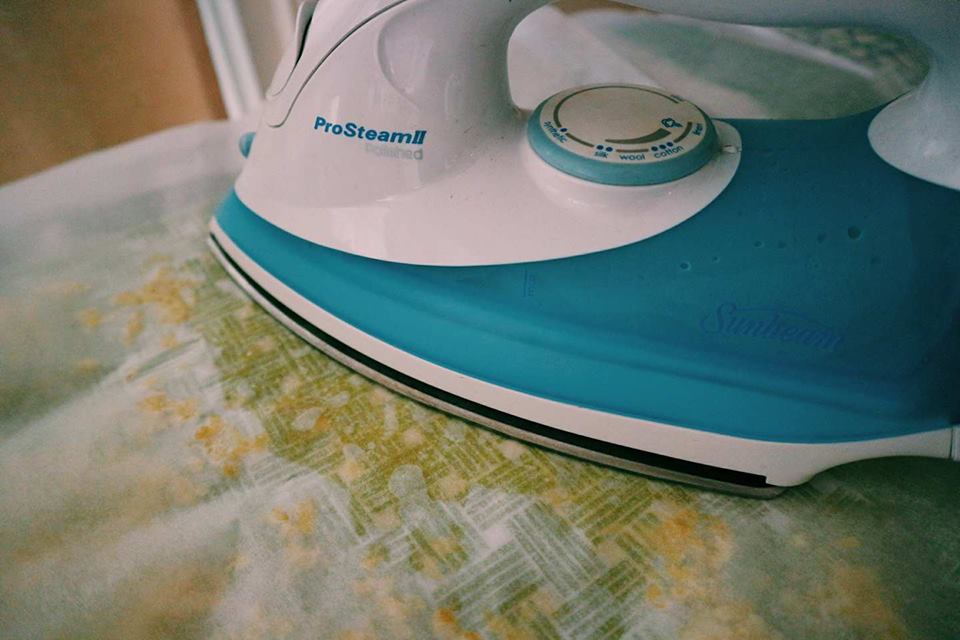
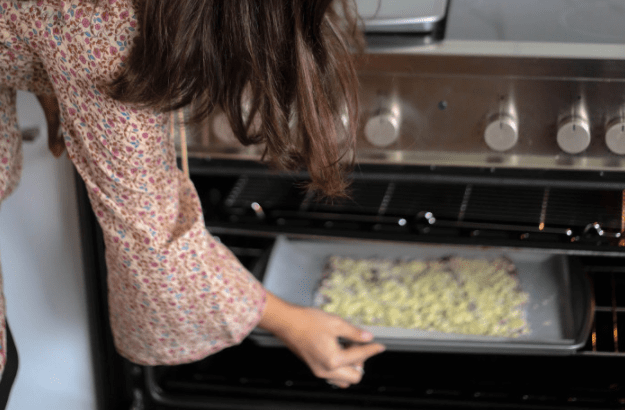
4. Cover the top completely with baking paper, and top with an old towel for better protection. Press down with your
hot iron.
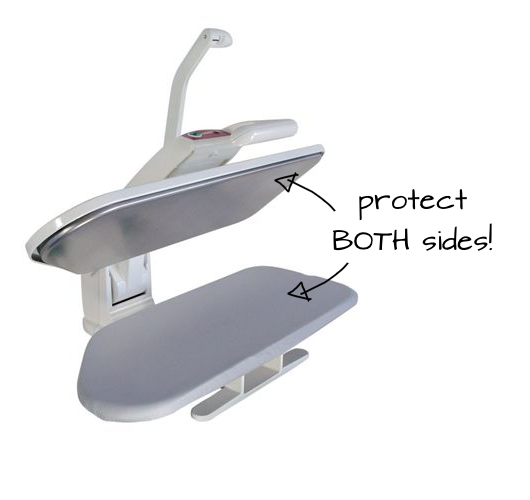
Or use an
Elna press
if you have one - it's quicker and gives much better results.
Alternatively -
bake yours in the oven. Think of it like a pizza - you want the "cheese" (I mean beeswax) to melt.
Use an clean old brush halfway through to spread the wax evenly.
Another way to melt is to
use an electric frypan. Melt all your wax and just dip
your fabric
one by one.
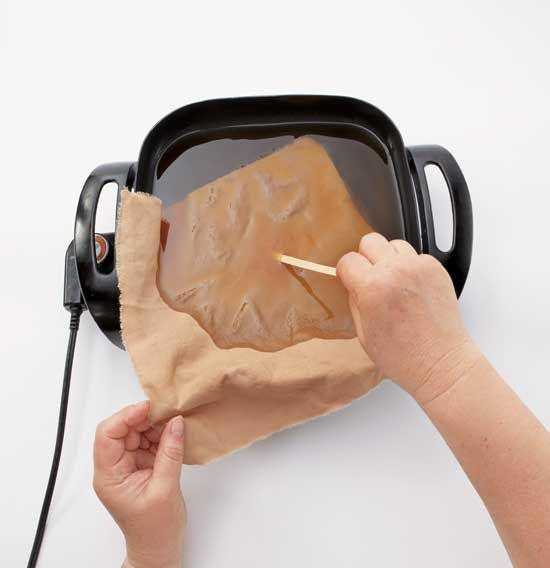
Of course, make sure the frypan is reserved for this purpose only. I'm sure it will be waxy forever!
Out of all the melting methods,
I personally find
Elna press the easiest - and least messy :-)

5. Check that the wax has melted evenly into the fabric.
It should look "wet" when the wax has been absorbed properly. If you see any "dry" spots, sprinkle some more
grated wax and repeat the melting.
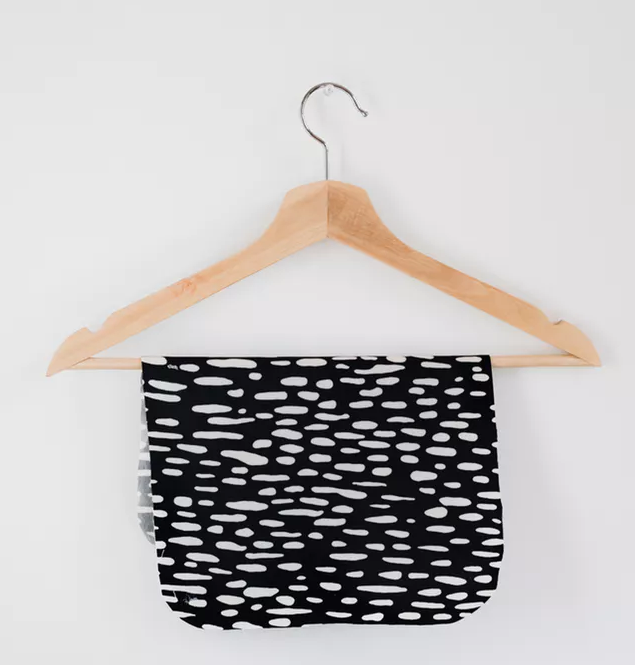
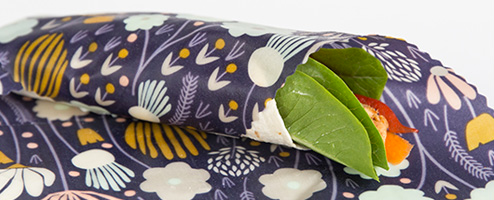
6. Let cool, and start using them in place of plastic cling wrap!
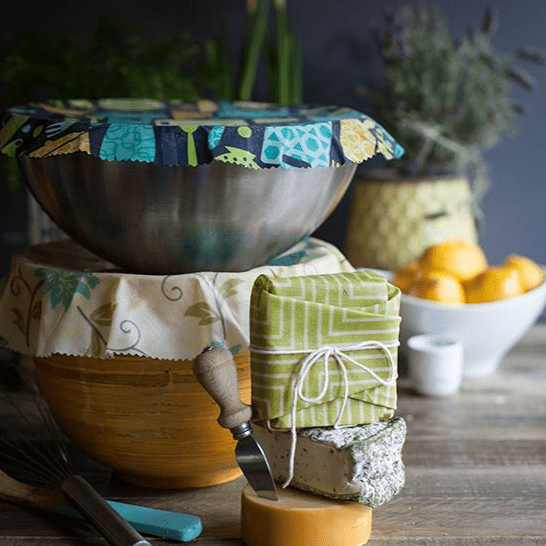
Voila - see how pretty they are?!
To reuse, simply rinse thoroughly under cold water with a tiny bit of dishwashing liquid, and let dry. Easy!
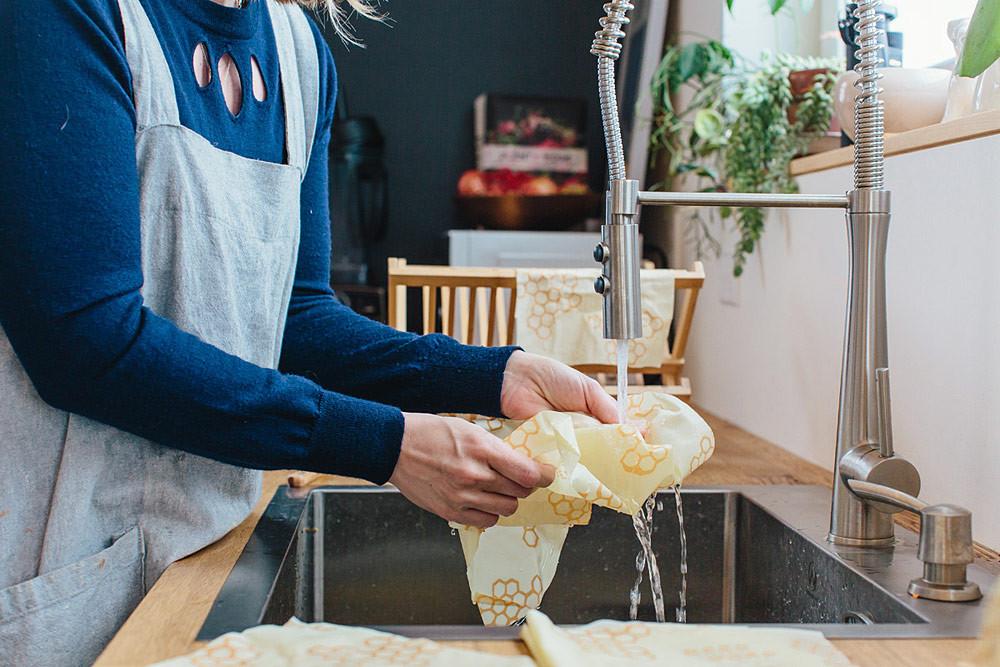
Don't use these wraps for raw meat though, because you can never wash them in hot water - you'd lose the wax. Because
of that, I know beeswax wrap won't replace Gladwraps 100%....

But -
how satisfying does it feel to find a new life for your unused fabric, AND cut down everyday plastic
waste at the same time. Brilliant, right?
To make it ever more fun, why not host a beeswax wrap party with your sewing friends?!
You can make larger batches
out of everyone's unused fabric.
Then sell them at school fetes / local craft or farmers markets.
Or even open your own
Etsy
store and make some pocket money!
Who knew?
All the possibilities from a bit of fabric decluttering and a hot surface :-)
Do you use beeswax wraps?
Have you made your own? Do you make and sell them?
Simply
Email Me to share your
photos with our readers - so we can all be inspired :-)
Until Next Time, and Happy Sewing!
![]()
xoxox